Welcome to Gau’s Barbarian Assault Attacker Guide for Leeches. This guide goes through the fundamental strategies as a solo attacker using the Magic shortbow (i) meta. This guide assumes you've played at least a few rounds as an attacker.
This guide is broken down into parts. After you have completed each part, you should play a few games in order to master that part before moving on to the next part. This guide goes into some of the most advanced techniques for an attacker. In order to join our clan, ONLY KNOWLEDGE OF PARTS 1-5 ARE REQUIRED. The rest of the guide aims to be as comprehensive as possible to cover everything about the attacker role for speedrunning and nitty-gritty optimization. Parts 6-8 are OPTIONAL for attackers to use. Don't be intimidated by the length!
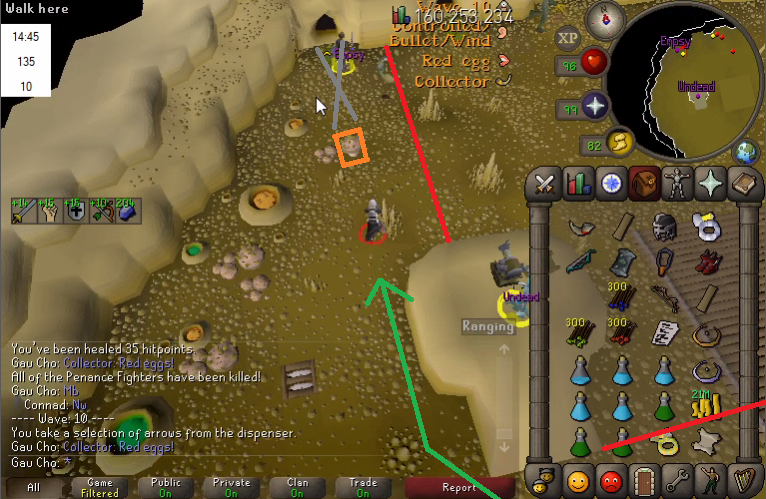
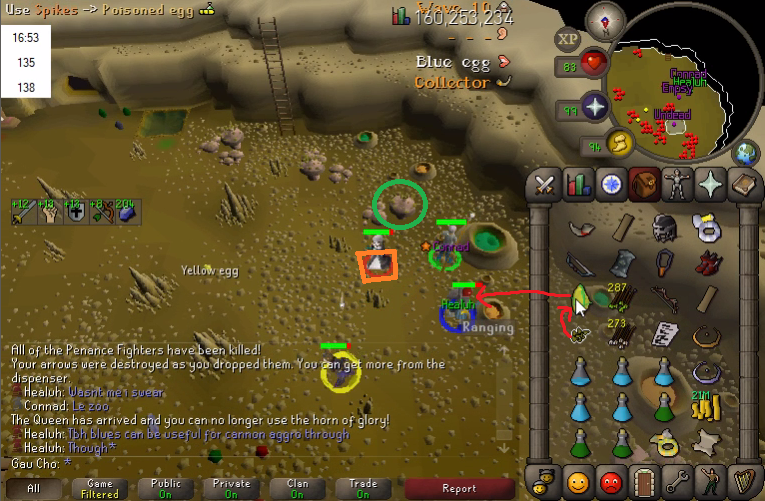
Example Elite Attacker Gameplay
Note this incorporates elements from parts 1-7 and so this goes way beyond what we expect for a simple attacker trial. It does demonstrate all the parts of the guide well though. Note that the crystal halberd mechanics in this video predate the Crystal halberd patch on 2018 June 7 and so the playstyle with the halberd is slightly different. However, the Crystal halberd section later in this guide is up to date.
Credits
History
Cheers ~Gau
This guide is broken down into parts. After you have completed each part, you should play a few games in order to master that part before moving on to the next part. This guide goes into some of the most advanced techniques for an attacker. In order to join our clan, ONLY KNOWLEDGE OF PARTS 1-5 ARE REQUIRED. The rest of the guide aims to be as comprehensive as possible to cover everything about the attacker role for speedrunning and nitty-gritty optimization. Parts 6-8 are OPTIONAL for attackers to use. Don't be intimidated by the length!
- PART 1
- Background
- Requirements
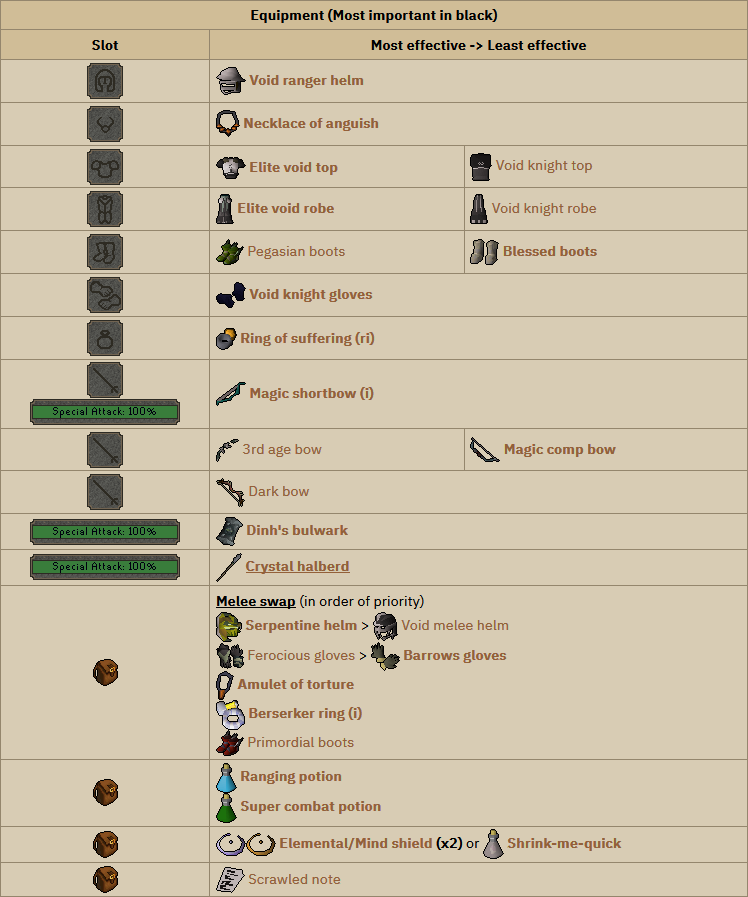
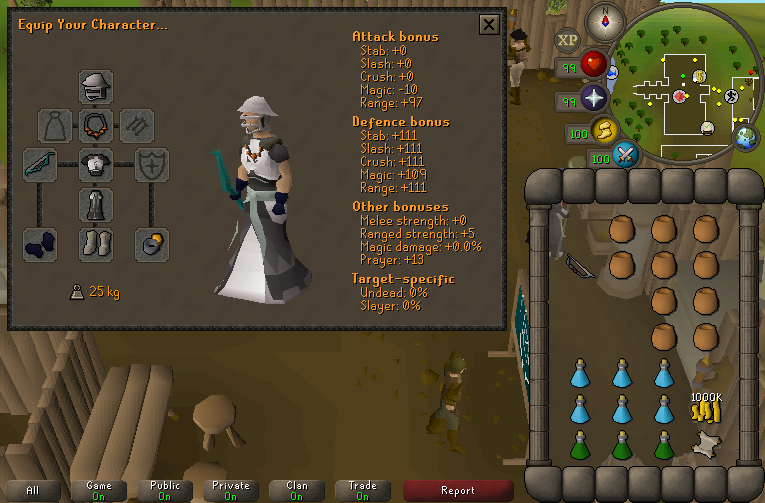
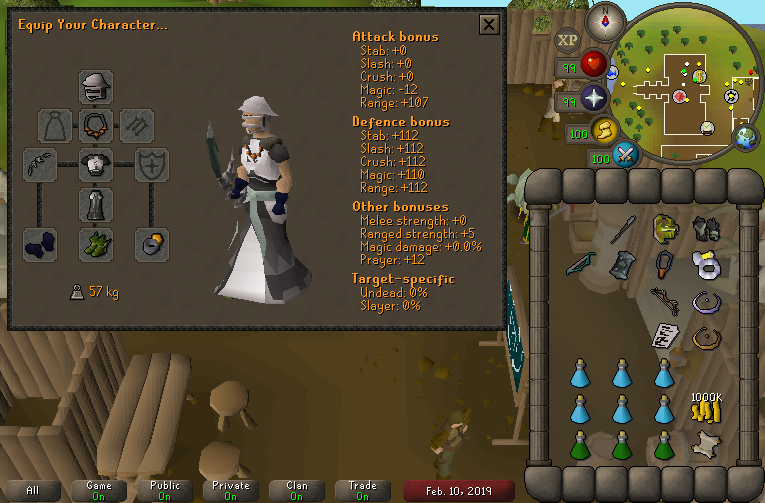
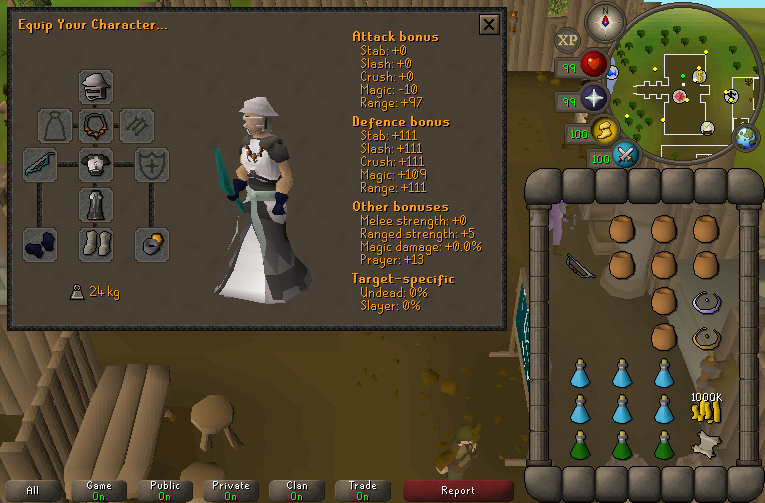
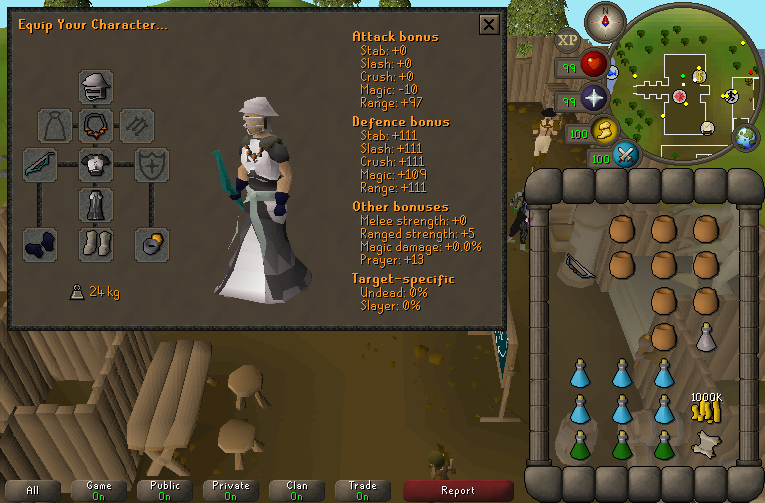
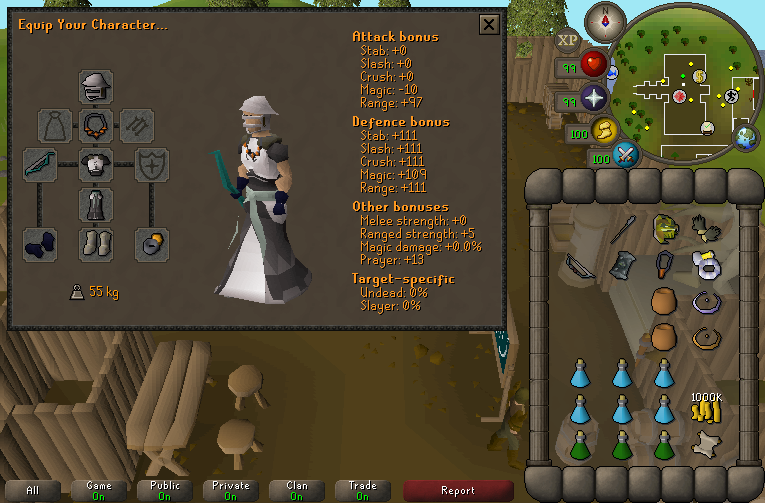
- Gear + Inventory Setup
- Scroll Order
- Timer Script
- PART 2
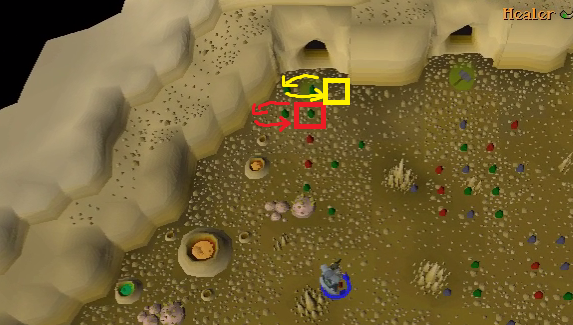
- Basic Gameplay (Waves 1-9)
- Magic comp bow & Magic shortbow (i)
- Wave 9 Survival
- Wave 10 (One-egging as Non-scroller)
- PART 3
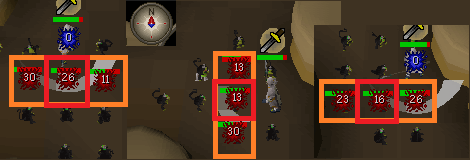
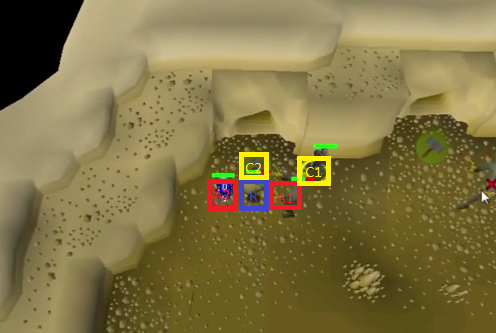
- Lower Wave Killing Order
- Wave 10 (Egg Force & Egg Dupe) (Mind shield)
- PART 4
- Dinh's bulwark
- Wave 10 A/C Block
- PART 5
- Crystal halberd
- Wave 5-9 A/C Block
- Monster Spawns (Dinh's bulwark and Crystal halberd)
- PART 6
- Dragon claws
- Dark bow (Call change)
- Dark bow (Wave 1)
- PART 7
- Force-ending Waves
- Scrawled note
- Mind-shield-loop
- PART 8
- Shrink-me-quick potion
- Advanced Penance Ranger tagging
- Scythe of vitur
Example Elite Attacker Gameplay
Note this incorporates elements from parts 1-7 and so this goes way beyond what we expect for a simple attacker trial. It does demonstrate all the parts of the guide well though. Note that the crystal halberd mechanics in this video predate the Crystal halberd patch on 2018 June 7 and so the playstyle with the halberd is slightly different. However, the Crystal halberd section later in this guide is up to date.
Credits
- Big T - Dinh's bulwark pioneer
- Dren - Dark bow discoverer
- flunch - Dragon claws, proofreading, inventory setup modifications, clips, playtesting
- henke - Crystal halberd pioneer, Scythe of vitur
- Pahy - Fighter safespot discoverer
- Sedation (Aptitude) - Videos for forcing, Crystal halberd pioneer
- Westies - Shrink-looping
- Whurse (with henke18) - Forcing mechanics
History
- 2018 Jan 20 - Pre-update theoretical gear guides.
- 2018 Jan 25 - Barbarian Assault arrow update day. Initial release of Attacker guide with slight modifications over the course of the week.
- 2018 May 22 - Forcing mechanics and guide
- 2018 Jun 9 - Crystal halberd guide update following Crystal halberd buff/nerf
- 2018 Jun 9 - Archers ring (i) no longer recommended
- 2018 Jun 12 - Whole guide revamped. Saradomin godsword no longer recommended.
- 2018 Jul 16 - Scythe of vitur generally not recommended except for very niche uses
- 2018 Aug 21 - Typos and mention of RuneLite timer
- 2018 Aug 24 - Updated Dinh's and Crystal halberd parts to reflect changing meta on special attack timing.
- 2018 Sep 13 - Further updates to Dinh's and Crystal halberd special attack timings.
- 2018 Nov 12 - Part 8 added: Shrink-me-quick potion, optimal Ranger tagging and Scythe of vitur niche uses now discussed
- 2019 Feb 9 - Shrink-me-quick potion has been given a more prominent role. Dragon claws have been moved to the miscellanious niche item section. Ferocious gloves have been added. The whole guide has been tweaked to be more up to date and to discuss tag order more prominently.
Cheers ~Gau
Last edited: